
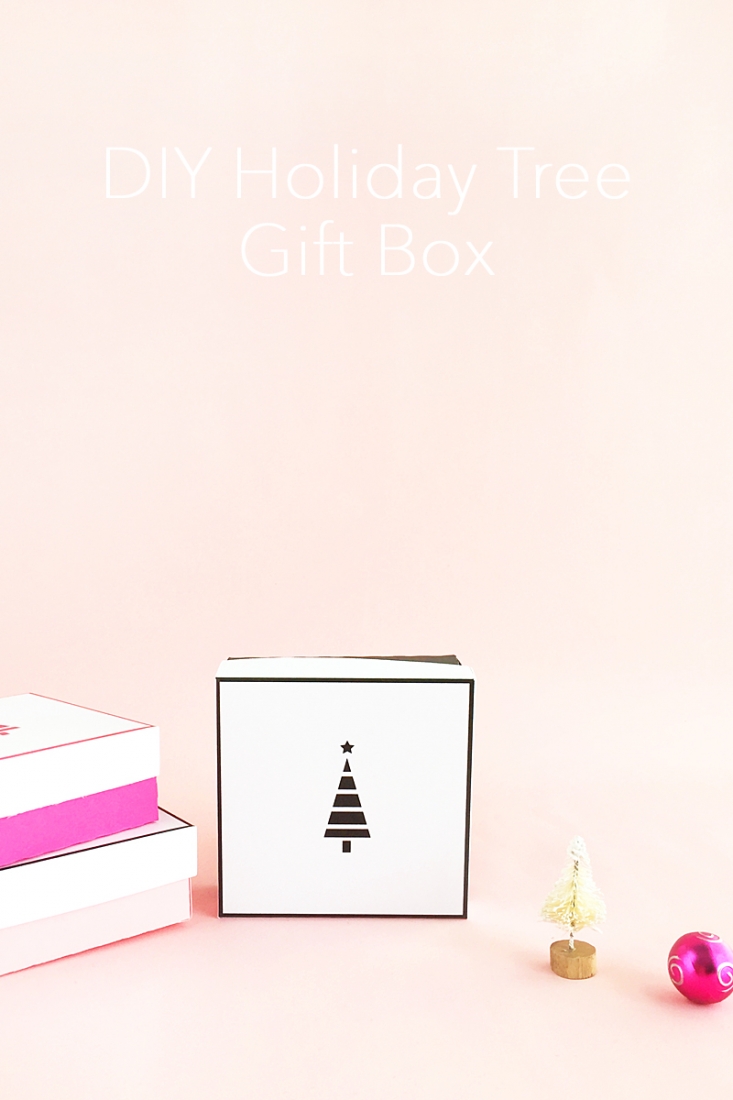
I had the happiest of mail a couple of weeks ago. Silhouette America (thank you, thank you, thank you!!) sent me the most gorgeous CAMEO 3 to play with and it’s such a dream. I adore each and every one of my Silhouette America products. I am proud to be an affiliate which also allows me to share fun projects like this Christmas Gift Box Tutorial. So naturally my first project with my new cutting machine had to be this DIY Holiday Tree Gift Box. It’s a fairly simple print and cut project to get my feet wet with the new machine. Read on for my first tutorial with this awesome new cutting machine….
What You Need To Make A Christmas Gift Box
- Silhouette Studio (there is a free version! For the CAMEO 3, you will need the latest version)
- Silhouette cutting machine (I used the CAMEO 3)
- Cutting mat (for the Silhouette)
- Cardstock
- Printer
- Tree Card design from the Silhouette Design Store. I use the tree graphic for the Christmas Gift Box
- Box and Flower Tags design. This is the box design I will use for the tutorial. I learned the hard way that the top of the box is the one with the smaller tabs!
- Glue
How To Make A Christmas Gift Box
The first step is to open your design and image in Silhouette Studio. Then, we will use the Print and Cut feature of the Silhouette CAMEO to cut the box lids. Lastly, we will send the bottoms of the boxes to cut.
Load Your Image and Design in Silhouette Studio
- In Silhouette Studio, open and ungroup your Tree Card design onto a new document
- Remove the card shape and color the tree with whatever fill colors you’d like for your Christmas Gift Box
- Merge your Box and Flower Tags design into the same file. This is the design for your box
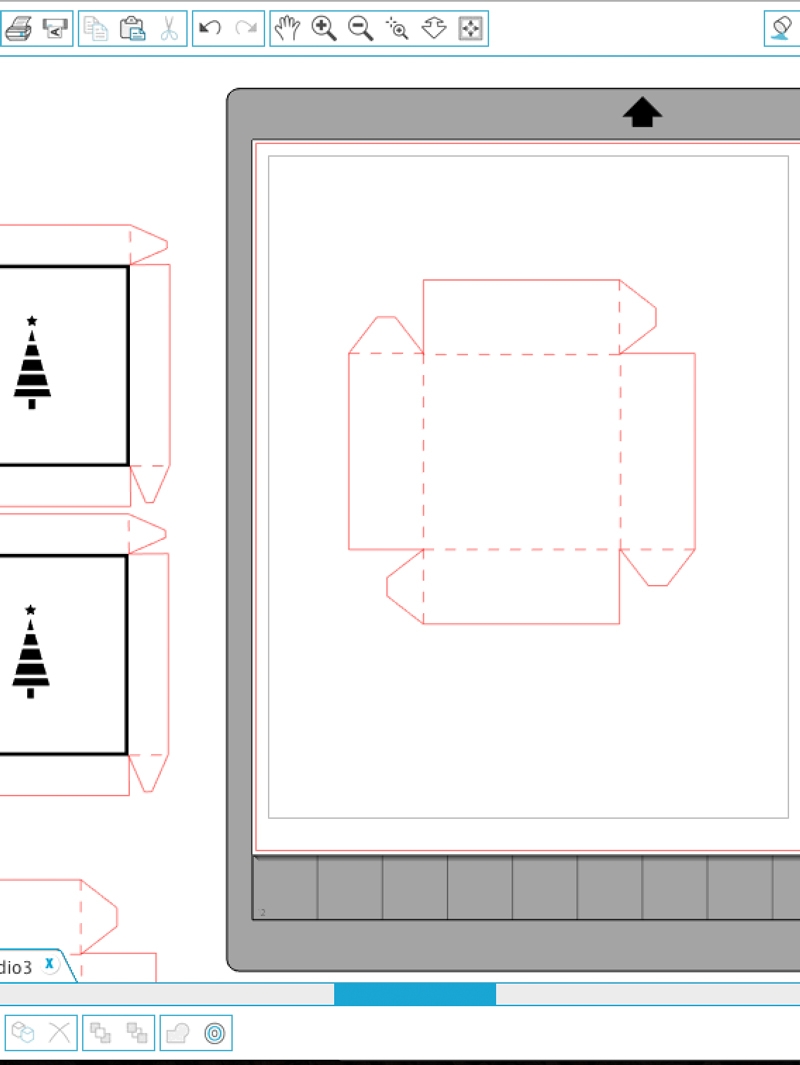
Print and Cut The Box Lid of the Christmas Gift Box
- Replace the inner square (with dashed lines) of the box lid with solid thick lines and the set to No Cut
- Place your tree graphic, which should also be set to No Cut, in the middle of the box lid design
- Show registration marks, then send to print and cut with cardstock settings. For the auto blade to work, select Automatic Blade in the Cut Settings. It will automatically change the blade setting for you. You can also choose to do this manually.
Cut The Bottom of the Christmas Gift Box
Once the lids are cut, remove the Registration Marks, and send the bottoms of the box to cut using cardstock settings.
Fun tip – the CAMEO 3 gives you the touchscreen option to repeat the same cut instead of clicking on the software on your computer!
Assemble Your Christmas Gift Boxes
To assemble your gift boxes, fold along the dashed lines, and adhere the tabs with glue for both the box lids and bottoms.
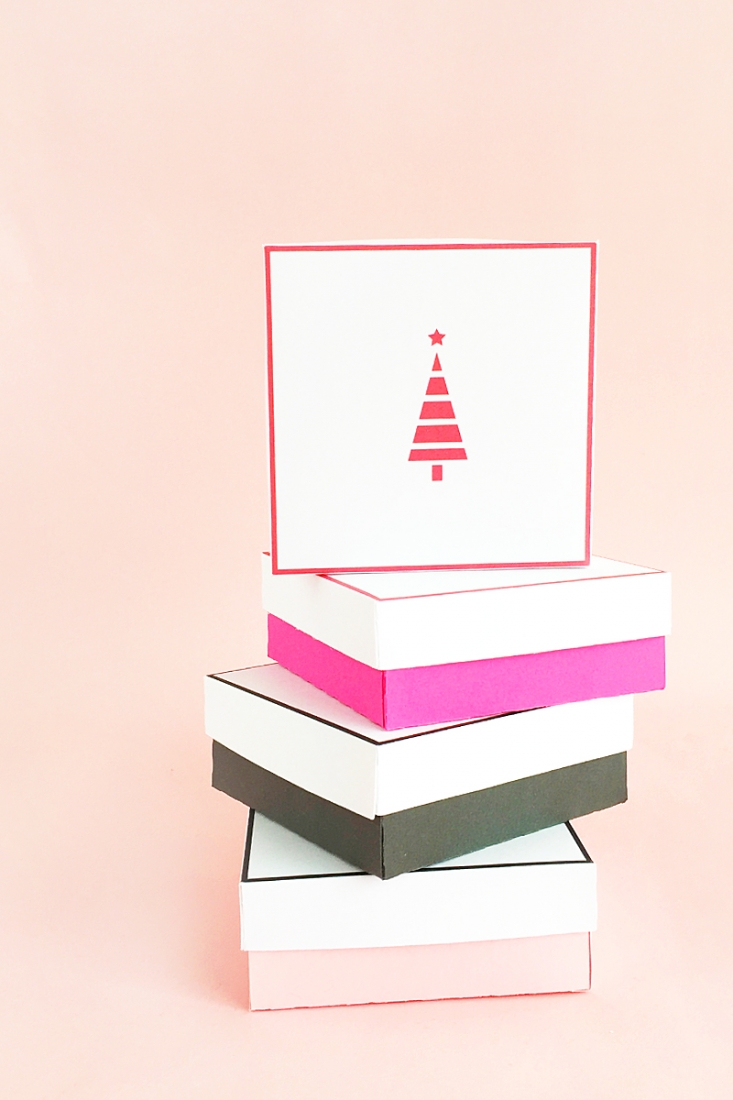
You now have the most adorable Christmas Gift Boxes and now all you need to do is add your pretty gift and put under the tree! Let me know how they turned out in the comments below!


This post is brought to you in partnership with Silhouette America. I adore my Silhouette cutting machines and all the other products I have used from Silhouette. This awesome partnership allows me to share great bundles and deals, as well as fun projects, like this one!
Looking for some more crafty inspiration? Take a look at my other fun Silhouette projects and craft a little longer with me!